MOOC List is learner-supported. When you buy through links on our site, we may earn an affiliate commission.
MOOC List is learner-supported. When you buy through links on our site, we may earn an affiliate commission.
This specific class will consolidate your understanding of how to draw lips and teeth with a lot of detail, as well as give you some understanding of how I create photo-realistic skin texture using a pencil.
Starting with learning how to sketch the reference image to creating hyperrealistic details with a pencil, this class will improve your confidence and technical artistic ability.
Class outcomes:
- Produce a copy of the provided reference image and submit a photo of this to the class projects
- Challenge: Take a photo of your own mouth, and using the tips, materials and advice in this class, produce a drawing of it and submit this to the class projects
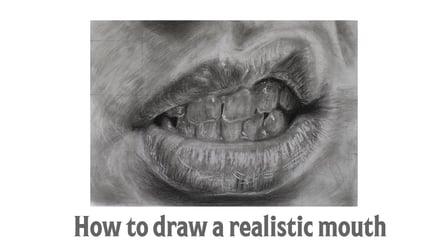
Your class project is to draw a realistic mouth - please see the attached image as a reference. Please feel free to share your drawing in the Class Project gallery
Recommended materials:
Paper:
- Winsor & Newton Paper
Pencils:
- Mechanical Pencil 0.5mm (for sketching)
- Faber Castell Pencils (for shading)
- Black Pencil (optional)
Lead:
- Derwent 0.5mm lead HB/2B
Eraser:
- Electric eraser pen
- Electric eraser replacements
- Kneadable eraser (optional)
- Thin eraser
Blending
- Blending Stumps
- Makeup Brushes
- Q-Tips
Additional tools:
- White acrylic pen
The reference image used can be seen below :)
MOOC List is learner-supported. When you buy through links on our site, we may earn an affiliate commission.
MOOC List is learner-supported. When you buy through links on our site, we may earn an affiliate commission.